( )
DockerでReact + Swagger 環境を作ろう
開発関連技術
開発環境, Docker, VSCode, JavaScript, React, Swagger
現在業務で React を使用しているのですが、事前勉強する際に Docker 環境を作成していたので、それを共有します。
ちなみに Swagger 環境に関しては、自分で作成してうまくいかなかったので、上司が作成した環境を参考にさせてもらいました。感謝です。
※この記事は Qiita からの転載です。
前提#
- Docker 導入済み
- docker-compose コマンドが使用できる
※2020/02/29
create-react-appがグローバルインストールをサポートしなくなったことに伴い、React 用のコンテナ周りを見直しました。
事前準備#
今回は4つのコンテナを使用。
- node…React のコードを実行するコンテナ
- swagger-editor…Swagger Editor のコンテナ
- swagger-api…Swagger 定義ファイルから生成されたコードを実行するコンテナ
- swagger-nginx…swagger-api の内容を配信するアプリケーションサーバのコンテナ(nginx をさらに高性能に使えるようにした openresty を使用)
これらに必要な設定ファイルを用意していきます。
ちなみに作成後のディレクトリは以下のようになります。
(root)
├ docker
│ ├ nginx
│ │  └ swagger.conf
│ └ swagger-api
│     ├ Dockerfile
│     └ swagger.json
└ docker-compose.ymlnginx/swagger.conf#
nginx(openresty) の設定を記述します。
ここで CORS に関する設定をしておかないと、Reac t側から axios でリクエストする際にエラーとなってしまいます。
(自分が最初環境を作ろうとしたときに、ここでつまづいていました。今も設定に関しては疎いです…。)
server {
  listen 80;
  server_name localhost;

  location /docs/ {
    proxy_pass http://swagger-api:8000/docs/;
  }

  location / {
    if ($request_method = 'OPTIONS') {
      add_header Access-Control-Allow-Origin $http_origin;
      add_header Access-Control-Allow-Headers 'X-Requested-With, Authorization, Origin, Accept, Content-Type';
      add_header Access-Control-Allow-Methods 'GET, POST, PUT, DELETE';
      add_header Access-Control-Max-Age 86400;
      add_header Access-Control-Allow-Credentials true;
      add_header Access-Control-Expose-Headers Set-Cookie;
      add_header Content-Type 'text/plain charset=UTF-8';
      add_header Content-Length 0;
      return 204;
    }
    proxy_pass http://swagger-api:8000;
    add_header Access-Control-Allow-Origin $http_origin always;
    add_header Access-Control-Allow-Credentials true always;
    add_header Access-Control-Expose-Headers Content-Disposition;
  }
}swagger-api/Dockerfile#
Swagger 定義ファイルをもとにコードを生成するSwagger Codegenをインストールして、実際に Node.js のコードを生成しています。
FROM openjdk:8-jdk-alpine

ARG CLI_VERSION=2.4.5

RUN wget http://central.maven.org/maven2/io/swagger/swagger-codegen-cli/${CLI_VERSION}/swagger-codegen-cli-${CLI_VERSION}.jar -O /swagger-codegen-cli.jar

RUN apk --update add bash nodejs npm && rm -rf /var/cache/apk/*

ADD swagger.json swagger.json

RUN java -jar /swagger-codegen-cli.jar generate -l nodejs-server -i swagger.json -o src && \
    cd src && npm install

CMD ["java", "-jar", "/swagger-codegen-cli.jar"]swagger-api/swagger.json#
Swagger 定義ファイルです。
ここでは簡単に1つだけ API を定義しています。
{
  "swagger": "2.0",
  "info": {
    "description": "テスト用API",
    "version": "1.0.0",
    "title": "Swagger test API設計書",
    "contact": {},
    "license": {
      "name": ""
    }
  },
  "host": "localhost:8000",
  "basePath": "/",
  "tags": [
    {
      "name": "User",
      "description": "User Controller"
    }
  ],
  "paths": {
    "/user": {
      "get": {
        "tags": [
          "User"
        ],
        "summary": "ユーザ情報取得",
        "description": "ユーザ情報を取得する。",
        "operationId": "doGetUsingGET",
        "consumes": [
          "application/json"
        ],
        "produces": [
          "application/json"
        ],
        "responses": {
          "200": {
            "description": "OK",
            "schema": {
              "$ref": "#/definitions/UserGetOut"
            }
          },
          "400": {
            "description": "バリデーションエラー",
            "schema": {
              "$ref": "#/definitions/ValidationErrorsOut"
            }
          },
          "500": {
            "description": "想定外のエラー",
            "schema": {
              "$ref": "#/definitions/ErrorInfo"
            }
          }
        }
      }
    }
  },
  "definitions": {
    "UserGetOut": {
      "type": "object",
      "required": [
        "userId",
        "name",
        "kana"
      ],
      "properties": {
        "userId": {
          "type": "string",
          "example": "abc001",
          "description": "ユーザID"
        },
        "name": {
          "type": "string",
          "example": "山田 太郎",
          "description": "名前"
        },
        "kana": {
          "type": "string",
          "example": "ヤマダ タロウ",
          "description": "カナ"
        }
      }
    },
    "ValidationError": {
      "type": "object",
      "required": [
        "itemName"
        "code",
        "content"
      ],
      "properties": {
        "itemName": {
          "type": "string",
          "example": "userId",
          "description": "項目名"
        },
        "code": {
          "type": "string",
          "example": "NotBlank",
          "description": "code"
        },
        "content": {
          "type": "string",
          "example": "必須項目が設定されていません。",
          "description": "content"
        }
      }
    },
    "ValidationErrorsOut": {
      "type": "object",
      "required": [
        "validationInfo"
      ],
      "properties": {
        "validationInfo": {
          "type": "array",
          "description": "バリデーション情報",
          "items": {
            "$ref": "#/definitions/ValidationError"
          }
        }
      }
    },
    "ErrorInfo": {
      "type": "object",
      "required": [
        "code",
        "content"
      ],
      "properties": {
        "code": {
          "type": "string",
          "example": "exception.errors.unexpeced.exception",
          "description": "エラーコード"
        },
        "content": {
          "type": "string",
          "example": "システムエラーが発生しました。誠に恐れ入りますが、初めからやり直して下さい。",
          "description": "メッセージ"
        }
      }
    }
  }
}docker-compose.yml#
今回使用する4つのコンテナ定義を書いていきます。
なお、node の environment のCHOKIDAR_USEPOLLING=trueはホットリロードを有効化にするものです。
node の command については一旦コメントアウトしておきます。
※node_modules について補足説明
node_modules は volume マウントすることが多いとは思われます。
コンテナ内のnpm or yarn の速度的にも、volume マウントの方がいいそうです。
ただ、そうするとローカルに node_modules ができなくなり、VSCode の ESLint 拡張を動かす時などに支障が出るので、あえてやっていません。
(VSCode のRemote - Containers拡張を使えばコンテナ内で作業できるので、解決する話ではあるのですが今回はやってません)
version: "3"
services:
  node:
    image: node:12-alpine
    environment:
      - NODE_ENV=development
      - CHOKIDAR_USEPOLLING=true
    volumes:
      - ./:/usr/app
    tty: true
    stdin_open: true
    working_dir: /usr/app
    # command: /bin/sh -c "yarn install && yarn start"
    ports:
      - "3000:3000"

  swagger-editor:
    image: swaggerapi/swagger-editor
    ports:
      - "8081:8080"

  swagger-api:
    build: ./docker/swagger-api
    working_dir: /src
    command: node index.js

  swagger-nginx:
    image: openresty/openresty:alpine
    ports:
      - 8000:80
    depends_on:
      - swagger-api
    volumes:
- ./docker/nginx/swagger.conf:/etc/nginx/conf.d/default.conf:roコンテナの作成と起動#
コンテナのビルド#
docker-compose buildコンテナ起動確認#
State が Up になっていれば立ち上がっています。
docker-compose psReact プロジェクト作成#
プロジェクトの雛形作成#
create-react-appを使用して雛形を作成します。
なお、ここで使用しているバージョンは3.4.0です。
docker-compose exec node yarn create react-app my-appyarn create v1.19.1
[1/4] Resolving packages...
[2/4] Fetching packages...
[3/4] Linking dependencies...
[4/4] Building fresh packages...
warning Your current version of Yarn is out of date. The latest version is "1.22.0", while you\'re on "1.19.1".
info To upgrade, run the following command:
$ curl --compressed -o- -L https://yarnpkg.com/install.sh | bash
success Installed "[email protected]" with binaries:
- create-react-app
[####################################################################################################] 100/100
Creating a new React app in /usr/app/my-app.
Installing packages. This might take a couple of minutes.
Installing react, react-dom, and react-scripts with cra-template...
yarn add v1.19.1
[1/4] Resolving packages...
[2/4] Fetching packages...
info [email protected]: The platform "linux" is incompatible with this module.
info "[email protected]" is an optional dependency and failed compatibility check. Excluding it from installation.
info [email protected]: The platform "linux" is incompatible with this module.
info "[email protected]" is an optional dependency and failed compatibility check. Excluding it from installation.
[3/4] Linking dependencies...
warning "react-scripts > [email protected]" has incorrect peer dependency "[email protected]".
warning "react-scripts > @typescript-eslint/eslint-plugin > [email protected]" has unmet peer dependency "typescript@>=2.8.0 || >= 3.2.0-dev || >= 3.3.0-dev || >= 3.4.0-dev || >= 3.5.0-dev || >= 3.6.0-dev || >= 3.6.0-beta || >= 3.7.0-dev || >= 3.7.0-beta".
[4/4] Building fresh packages...
success Saved lockfile.
success Saved 9 new dependencies.
info Direct dependencies
├─ [email protected]
├─ [email protected]
├─ [email protected]
└─ [email protected]
info All dependencies
├─ [email protected]
├─ [email protected]
├─ [email protected]
├─ [email protected]
├─ [email protected]
├─ [email protected]
├─ [email protected]
├─ [email protected]
└─ [email protected]
Done in 161.91s.
Git repo not initialized Error: Command failed: git --version
at checkExecSyncError (child_process.js:621:11)
at execSync (child_process.js:657:15)
at tryGitInit (/usr/app/my-app/node_modules/react-scripts/scripts/init.js:46:5)
at module.exports (/usr/app/my-app/node_modules/react-scripts/scripts/init.js:267:7)
at [eval]:3:14
at Script.runInThisContext (vm.js:116:20)
at Object.runInThisContext (vm.js:306:38)
at Object.<anonymous> ([eval]-wrapper:9:26)
at Module._compile (internal/modules/cjs/loader.js:956:30)
at evalScript (internal/process/execution.js:80:25) {
status: 127,
signal: null,
output: [ null, null, null ],
pid: 104,
stdout: null,
stderr: null
}
Installing template dependencies using yarnpkg...
yarn add v1.19.1
[1/4] Resolving packages...
[2/4] Fetching packages...
info [email protected]: The platform "linux" is incompatible with this module.
info "[email protected]" is an optional dependency and failed compatibility check. Excluding it from installation.
info [email protected]: The platform "linux" is incompatible with this module.
info "[email protected]" is an optional dependency and failed compatibility check. Excluding it from installation.
[3/4] Linking dependencies...
warning "react-scripts > [email protected]" has incorrect peer dependency "[email protected]".
warning "react-scripts > @typescript-eslint/eslint-plugin > [email protected]" has unmet peer dependency "typescript@>=2.8.0 || >= 3.2.0-dev || >= 3.3.0-dev || >= 3.4.0-dev || >= 3.5.0-dev || >= 3.6.0-dev || >= 3.6.0-beta || >= 3.7.0-dev || >= 3.7.0-beta".
warning " > @testing-library/[email protected]" has unmet peer dependency "@testing-library/dom@>=5".
[4/4] Building fresh packages...
success Saved lockfile.
success Saved 18 new dependencies.
info Direct dependencies
├─ @testing-library/[email protected]
├─ @testing-library/[email protected]
├─ @testing-library/[email protected]
├─ [email protected]
└─ [email protected]
info All dependencies
├─ @sheerun/[email protected]
├─ @testing-library/[email protected]
├─ @testing-library/[email protected]
├─ @testing-library/[email protected]
├─ @testing-library/[email protected]
├─ @types/[email protected]
├─ @types/[email protected]
├─ @types/[email protected]
├─ @types/[email protected]
├─ @types/[email protected]
├─ [email protected]
├─ [email protected]
├─ [email protected]
├─ [email protected]
├─ [email protected]
├─ [email protected]
├─ [email protected]
└─ [email protected]
Done in 41.98s.
Removing template package using yarnpkg...
yarn remove v1.19.1
[1/2] Removing module cra-template...
[2/2] Regenerating lockfile and installing missing dependencies...
info [email protected]: The platform "linux" is incompatible with this module.
info "[email protected]" is an optional dependency and failed compatibility check. Excluding it from installation.
info [email protected]: The platform "linux" is incompatible with this module.
info "[email protected]" is an optional dependency and failed compatibility check. Excluding it from installation.
warning " > @testing-library/[email protected]" has unmet peer dependency "@testing-library/dom@>=5".
warning "react-scripts > [email protected]" has incorrect peer dependency "[email protected]".
warning "react-scripts > @typescript-eslint/eslint-plugin > [email protected]" has unmet peer dependency "typescript@>=2.8.0 || >= 3.2.0-dev || >= 3.3.0-dev || >= 3.4.0-dev || >= 3.5.0-dev || >= 3.6.0-dev || >= 3.6.0-beta || >= 3.7.0-dev || >= 3.7.0-beta".
success Uninstalled packages.
Done in 48.44s.
Success! Created my-app at /usr/app/my-app
Inside that directory, you can run several commands:
yarn start
Starts the development server.
yarn build
Bundles the app into static files for production.
yarn test
Starts the test runner.
yarn eject
Removes this tool and copies build dependencies, configuration files
and scripts into the app directory. If you do this, you can’t go back!
We suggest that you begin by typing:
cd my-app
yarn start
Happy hacking!
Done in 267.52s.これでプロジェクトの雛形が作成されます。
この時点でのディレクトリ構成は以下のようになります。
(root)
├ my-app
│  ├ node_modules
│  │  └ (各種パッケージ)
│  ├ public
│  │  ├ favicon.ico
│  │  ├ index.html
│  │  ├ logo192.png
│  │  ├ logo512.png
│  │  ├ manifest.json
│  │  └ rebots.txt
│  ├ src
│  │  ├ App.css
│  │  ├ App.js
│  │  ├ App.test.js
│  │  ├ index.css
│  │  ├ index.js
│  │  ├ logo.svg
│  │  ├ serviceWorker.js
│  │  └ setupTests.js
│  ├ .gitignore
│  ├ package.json
│  ├ README.md
│  ├ yarn.lock
├ docker
│  ├ nginx
│  │  └ swagger.conf
│  └ swagger-api
│      ├ Dockerfile
│      └ swagger.json
└ docker-compose.yml作成したプロジェクトの雛形を移動#
ここで自分の場合は、プロジェクトルート直下にmy-appの中身を置きたかったので移動させました。
docker-compose exec node mv ./my-app/* .
docker-compose exec node mv ./my-app/.gitignore .
docker-compose exec node rm -rf my-app
移動後のディレクトリ構成。
(root)
├ node_modules
│  └ (各種パッケージ)
├ public
│  ├ favicon.ico
│  ├ index.html
│  ├ logo192.png
│  ├ logo512.png
│  ├ manifest.json
│  └ rebots.txt
├ src
│  ├ App.css
│  ├ App.js
│  ├ App.test.js
│  ├ index.css
│  ├ index.js
│  ├ logo.svg
│  ├ serviceWorker.js
│  └ setupTests.js
├ .gitignore
├ package.json
├ README.md
├ yarn.lock
├ docker
│  ├ nginx
│  │  └  swagger.conf
│  └  swagger-api
│      ├ Dockerfile
│      └  swagger.json
└  docker-compose.yml
後から移動させるなら、元からカレントディレクトリに雛形を作成すればいいのでは?と思われそうですが…。
カレントディレクトリだと docker ディレクトリや docker-compose.yml があるため、雛形作成の邪魔になるらしく、エラーになります。
コンテナ起動時のコマンドの有効化#
docker-compose.yml の node の command のコメントアウトを解除します。
command: /bin/sh -c "yarn install && yarn start"コンテナの再ビルド#
有効化したコマンドを反映させるために再ビルドします。
docker-compose up -d --buildうまくいっていれば、コマンドが実行されてサーバが起動しているはずです。
ブラウザでアクセス#
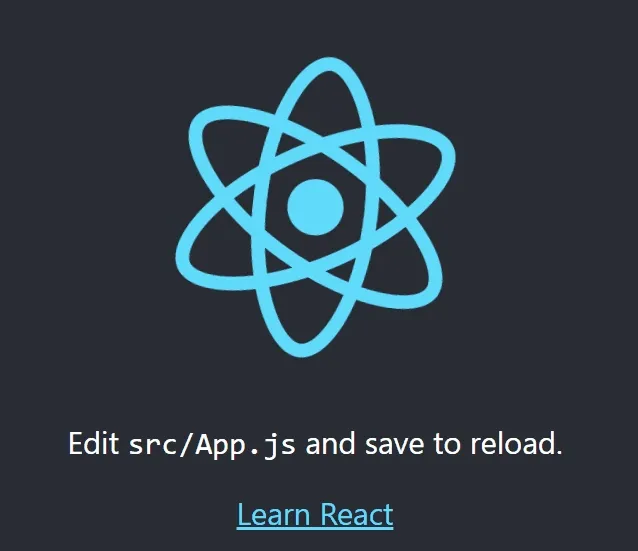
localhost:3000にアクセスして、以下のような画面になればOKです。
ちなみにホットリロードを有効化にしているため、コードを変更して保存すると即座に反映されます。
Swagger#
Swagger Editor#
localhost:8081にアクセス。
左側がエディタ、右側が定義をもとにしたドキュメントとなっています。
デフォルトではサンプルの API 定義が表示されます。

Swagger 定義ファイルを読み込む場合は、File → Import File からインポートできます。
なお、エディタ上から定義をもとにしたコードを生成もできます。
※注意点
エディタ上の変更は自動で保存されますが、インポートしたファイル自体を保存までは行ってくれません。
エディタで変更した定義ファイルをアプリケーションサーバに反映させたい場合は、File → Convert and save as JSON でファイルをダウンロード。
(root)/docker/swagger-api 配下に設置して、コンテナをビルドしなおす必要があります。
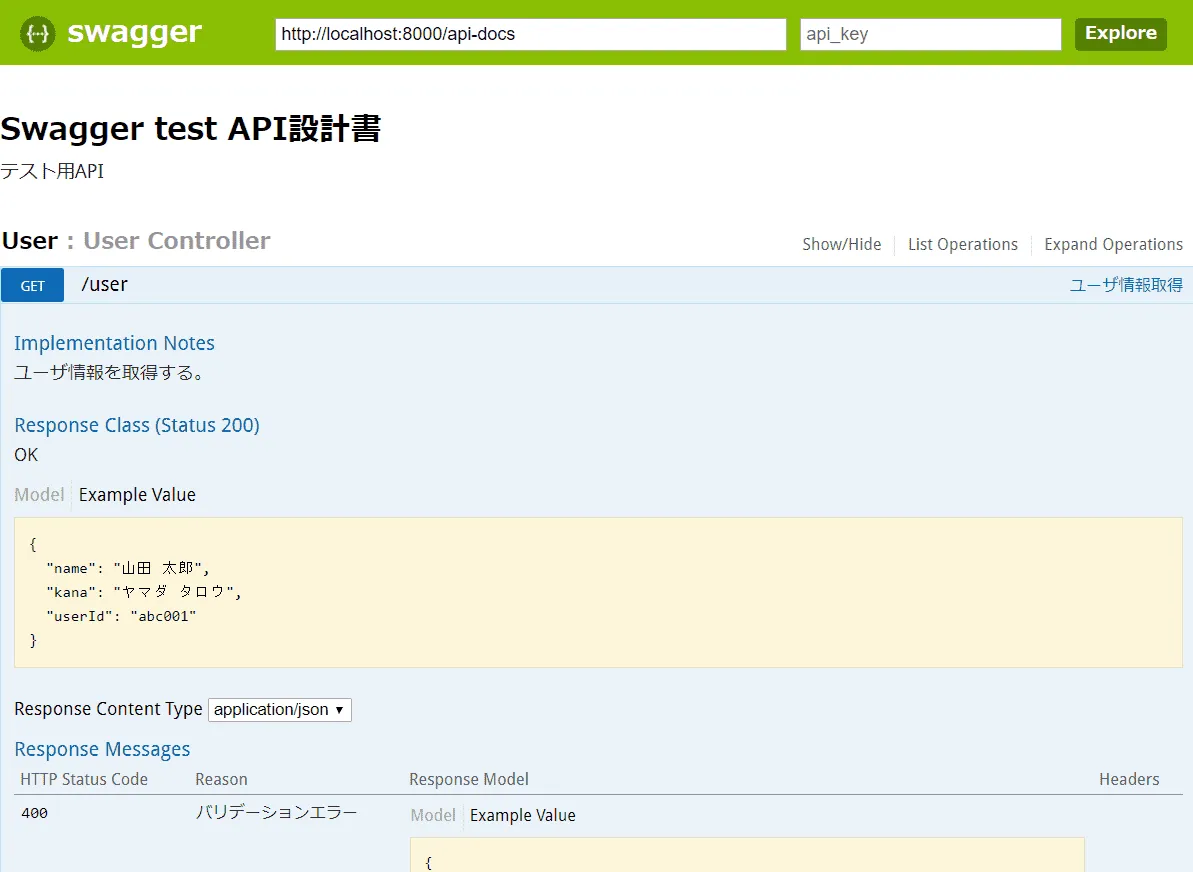
Swagger UI#
Swagger Codegen を使用してコードを生成すると、あわせてドキュメントも作成してくれています。
localhost:8000/docsにアクセスすることで確認できます。
ちなみに最初は Swagger UIのコンテナをまた別で立ち上げていました。
ただ、参照する Swagger 定義ファイルを編集しているうちに、ファイルに間違いがない状態でもなぜかエラーが出てしまい、いまいち使えなくなってしまいました。
(Swagger Editor 上で何もエラーが出ていない状態で出力したファイルでもエラーになりました)
Swagger のサーバ#
localhost:8000でアクセスできます。
今回は Swagger 定義ファイルで定義している API にリクエストしてみます。
ブラウザからアクセス#
GET の API なので、直接ブラウザからアクセスしてもレスポンスが返ってきます。
localhost:8000/userにアクセスすると以下のようになります。

axios でアクセス#
yarn で axios をインストール。
docker-compose exec node yarn add axiossrc/App.js を以下のように修正。
(あまりいい書き方ではないでしょうが、とりあえず動作確認用のコードです)
import React from 'react';
import logo from './logo.svg';
import './App.css';
import axios from 'axios'; // 追記

function App() {
  return (
    <div className="App">
      <header className="App-header">
        <img src={logo} className="App-logo" alt="logo" />
        <p>
          Edit <code>src/App.js</code> and save to reload.
        </p>
        <a
          className="App-link"
          href="https://reactjs.org"
          target="_blank"
          rel="noopener noreferrer"
        >
          Learn React
        </a>
        {/* 以下を追記 */}
        <button
          onClick={
            () => axios.get('http://localhost:8000/user')
                       .then((result) => {
                         console.log(result)
                       })
                       .catch((error) => {
                         console.log(error)
                       })
          }
        >
          APIリクエスト
        </button>
        {/* ここまで追記 */}
      </header>
    </div>
  );
}
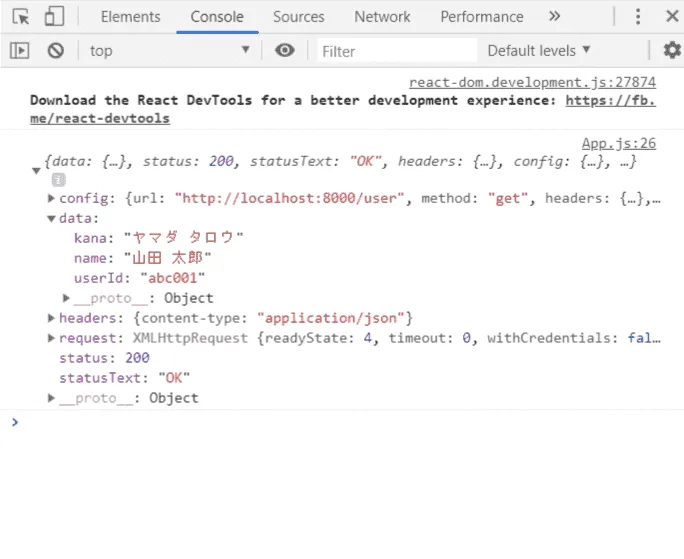
export default App;localhost:3000にアクセスし、API リクエストのボタンを押すと axios のリクエストが実行されます。
コンソールに出力しているので、Developer Tools で確認すると以下のようにデータが取得できているのが確認できるはず。
その他必要なもの#
使用しているエディタに React に関する拡張を導入するとより開発しやすくなります。
VSCode 拡張#
Full React/React Native/React Router/Redux/GraphQL/ES7/Testing/PropTypes snippets#
名称にある通り、各種のスニペットが使用でき、慣れてくるとコーディングが捗るかと思います。
(自分はあまり使いこなせてなかったりします…)
ESLint + Prettier(2019/11/06追記)#
静的解析ツールであるESLintも導入した方がいいでしょうが、VSCode 上で動かすのがうまくいかなかったので今回は書いていません。
(いずれちゃんと設定できたら書くかも…)
↓
長くなったので別記事に書きました。
create-react-appで作成した雛形 + VSCodeにESLintとPrettierを導入する
Chrome 拡張#
React Developer Tools#

Developer Tools に Components と Profiler タブが追加されます。
コンポーネントの階層や、props や state の中身を確認できデバッグがしやすくなります。
-
Chromeウェブストアからインストール
-
Chrome の React Developer Tools アイコンを右クリックして、「拡張機能を管理」へ
-
「ファイルの URL へのアクセスを許可する」をONにする
設定のカスタマイズ(2019/11/06追記)#
crate-react-app で作成した雛形に Babel、Webpack、ESLint などの設定が見当たりませんが、内部的に設定が行われており、一から手動で設定する必要がありません。
yarn.lock でreact-scriptの中に依存関係となっていることが確認できます。
※一部抜粋
[email protected]:
  version "3.4.0"
  resolved "https://registry.yarnpkg.com/react-scripts/-/react-scripts-3.4.0.tgz#f413680f0b5b937c8879ba1ffdae9b8c5b364bf5"
  integrity sha512-pBqaAroFoHnFAkuX+uSK9Th1uEh2GYdGY2IG1I9/7HmuEf+ls3lLCk1p2GFYRSrLMz6ieQR/SyN6TLIGK3hKRg==
  dependencies:
    "@babel/core" "7.8.4"
    "@svgr/webpack" "4.3.3"
    "@typescript-eslint/eslint-plugin" "^2.10.0"
    "@typescript-eslint/parser" "^2.10.0"
    babel-eslint "10.0.3"
    babel-jest "^24.9.0"
    babel-loader "8.0.6"
    babel-plugin-named-asset-import "^0.3.6"
    babel-preset-react-app "^9.1.1"
    camelcase "^5.3.1"
    case-sensitive-paths-webpack-plugin "2.3.0"
    css-loader "3.4.2"
    dotenv "8.2.0"
    dotenv-expand "5.1.0"
    eslint "^6.6.0"
    eslint-config-react-app "^5.2.0"
    eslint-loader "3.0.3"
    eslint-plugin-flowtype "4.6.0"
    eslint-plugin-import "2.20.0"
    eslint-plugin-jsx-a11y "6.2.3"
    eslint-plugin-react "7.18.0"
    eslint-plugin-react-hooks "^1.6.1"
    file-loader "4.3.0"
    fs-extra "^8.1.0"
    html-webpack-plugin "4.0.0-beta.11"
    identity-obj-proxy "3.0.0"
    jest "24.9.0"
    jest-environment-jsdom-fourteen "1.0.1"
    jest-resolve "24.9.0"
    jest-watch-typeahead "0.4.2"
    mini-css-extract-plugin "0.9.0"
    optimize-css-assets-webpack-plugin "5.0.3"
    pnp-webpack-plugin "1.6.0"
    postcss-flexbugs-fixes "4.1.0"
    postcss-loader "3.0.0"
    postcss-normalize "8.0.1"
    postcss-preset-env "6.7.0"
    postcss-safe-parser "4.0.1"
    react-app-polyfill "^1.0.6"
    react-dev-utils "^10.2.0"
    resolve "1.15.0"
    resolve-url-loader "3.1.1"
    sass-loader "8.0.2"
    semver "6.3.0"
    style-loader "0.23.1"
    terser-webpack-plugin "2.3.4"
    ts-pnp "1.1.5"
    url-loader "2.3.0"
    webpack "4.41.5"
    webpack-dev-server "3.10.2"
    webpack-manifest-plugin "2.2.0"
    workbox-webpack-plugin "4.3.1"
  optionalDependencies:
fsevents "2.1.2"これらの設定をカスタマイズしたい場合は、yarn ejectすることで内部的に設定されていた内容で config 配下に設定ファイルが作られ、カスタマイズが可能です。
また、あわせてreact-scriptの依存関係のパッケージと設定が package.json に記述されます。
※ESLint に関してはyarn ejectしなくてもカスタマイズが可能でした。
注意点として一度yarn ejectすると、元に戻すことはできません。